Bedroom Wall Hooks
My apartment walls are decked with family photos, storage baskets, and more, yet there are no holes. What's my secret? Command Hooks!
How to Use Command Hooks Properly
- Choose the hook with the proper weight capacity for your job.
- Affix the red side of the strip to the hook and the black side to the wall.
- Wait for an hour or more before hanging your item.
- Test the stability of your hung hooks periodically.
- To remove, simply pull straight down on the tab attached to the strip.
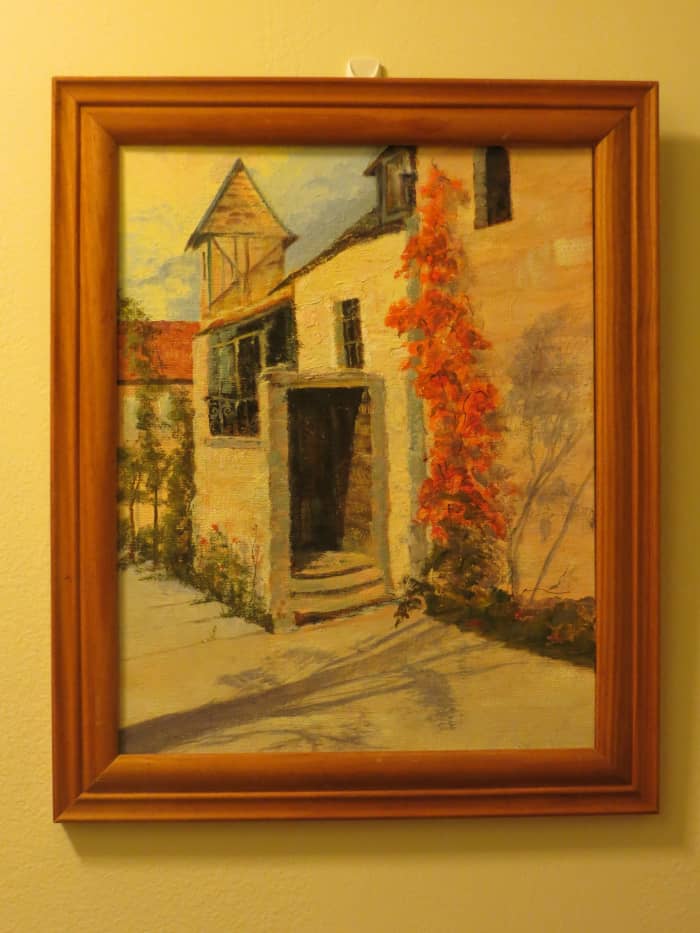
When my grandmother framed her painting, she attached a wire hanger to the back. The wire now rests comfortably on the Command hook behind it.
Photo by the author (Blundermom) Painting by her grandmother, owned by the author
Choosing and Using Command Hooks
Why Use Command Hooks?
When I moved into my first apartment, I couldn't wait to make it feel homier by filling up all those big, empty, white walls. I had a decent collection of beautiful art to display, and I was planning on using hanging storage baskets to keep the place tidy. However, as I signed my lease, which has very strict clauses that forbid nailing holes into the walls or damaging them in any way, I wondered how I would do all my decorating.
Enter the Command Hook.
I first discovered the Command brand strips in college when I wanted to hang up posters in my dorm room without damaging the walls. I had used various mounting strips, putties, and of course regular scotch tape in the past, but nothing hung posters as securely or could be removed with so little frustration or damage as Command strips. I had seen the strips packaged with hooks before, but I didn't have much use for them until now.
How to Make a Command Hook Work for You
Below, you will find examples of how I use Command hooks creatively to hang various things up in my apartment. I have included some helpful Amazon links to the specific products I used for different projects and explanations of how I completed them. If you've never used Command hooks before, keep the following in mind:
- Different hooks have different weight limits. I cannot stress enough how important it is to read the packaging of the hooks so you can select which one will be well suited to your purposes. In general, the larger and heavier the item, the larger the hook you want to buy. I have made the mistake of trying to hang a larger item (a shadow box) on a smaller hook, and at first it seemed to work just fine. The first humid day of the year, however, the hook loosened and dropped the shadow box with a loud thud. I had only myself to blame.
- It really does matter which side of the strip you affix to the hook. Each Command strip comes with a "hook" side which is printed in red, and a "wall" side printed in black. You want to peel off the red "hook" side of the strip first, and press it into the flat, smooth area of the hook where it belongs. Then, after determining where exactly you want to stick the hook to your wall, peel off the black "wall" side and press it in place.
- Wait for an hour or more before hanging your item. I've been guilty of trying to hang up my picture right away, and I suffered the consequences. It is really worth the wait to give the hook an hour or more to get fully affixed to the wall before trying to hang anything on it.
- Check on it periodically. Like anything else, a Command strip is going to wear over time. Every once in a while, it's a good idea to try to wiggle the hook with your finger to see if it goes anywhere. If it has gotten loose, simply pull straight down on the tab to remove the strip, and replace it with a fresh, new strip. The hooks can be used over and over again, and you just have to replace the adhesive strip!
Beginning With the Basics: How to Hang Art
This is just about the simplest, most straightforward way to use a Command Hook, so I thought I'd start here.
As always when you're hanging art or anything else for aesthetic purposes, it's important to do your measurements carefully to ensure your placement is where you want it to be. Thankfully, each package of Command hooks comes with more strips than hooks, leaving you a little room for trial and error.
For hanging up the art in my apartment, I used the basic Command wire hooks because that's what was available at my local home improvement store.
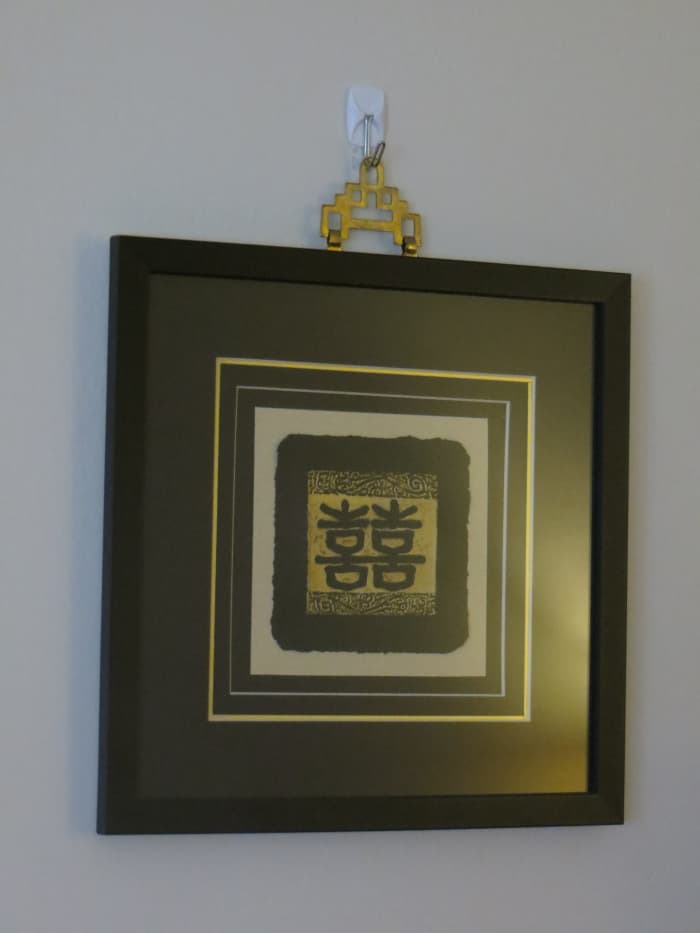
Photo by the author (Blundermom)
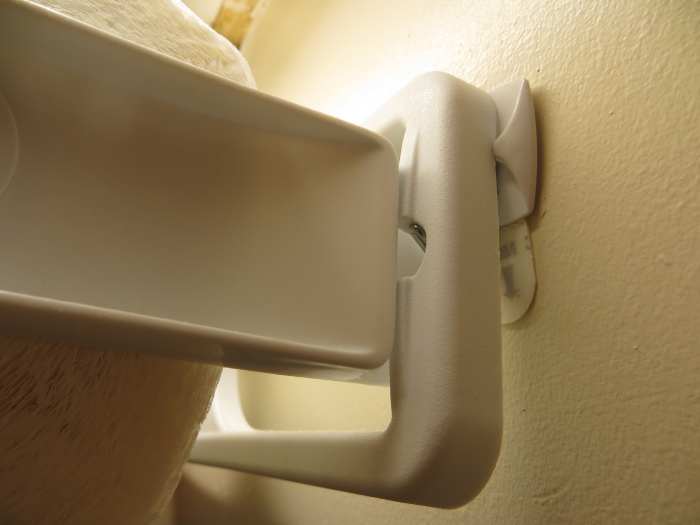
Photo by the author (Blundermom)
How to Hang a Paper Towel Holder With Command Hooks
Here is where the Command hook tips and tricks start getting interesting.
When I moved into this apartment, I realized I simply didn't have enough counter space to use one of those counter-top paper towel holders. Plus, I like being able to grab and rip off a paper towel with one hand, as I'm often pretty busy when I'm in the kitchen. So, here's what I did:
- I ordered the lightest paper towel holder I could find on Amazon with mounting holes in the back (see below for the exact one I ordered).
- I took my run-of-the-mill wire Command hooks, bent them out just a tiny bit, and hooked each one through the mounting holes in the back (where the screws were supposed to go).
- To easily determine placement, I placed the paper towel holder with the hooks in it where I wanted it to go over my kitchen sink. Then, I used a pencil to mark where the Command hooks were sitting.
- Then, I affixed the strips to the hooks, and then the hooks to the wall where the pencil marks were.
- After waiting for a few hours for the hooks to become fully secured to the wall, I took the paper towel holder and snapped it over the Command hooks so that the wire part was sticking through the mounting holes as they had been when I figured out the placement.
The photo under the title shows a close-up of what I'm talking about. My paper towels have been hanging sturdily for over a year now!
Note: This is the type of paper towel holder I used for this project.
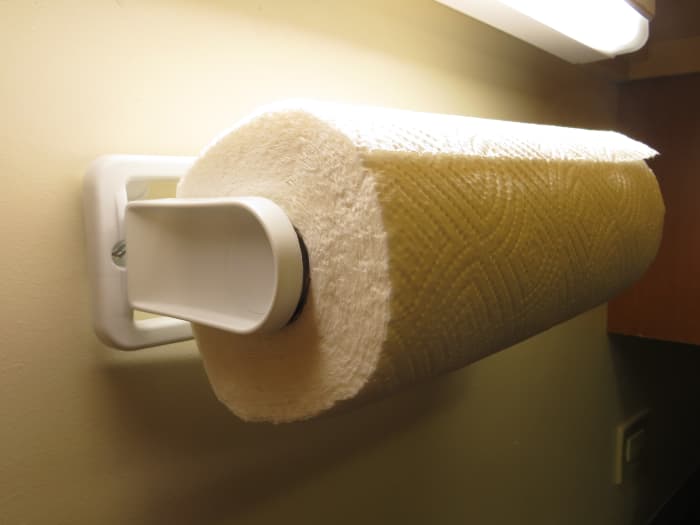
Photo by the author (Blundermom)
How to Hang Small Storage Baskets With Command Hooks
Welcome to my bathroom closet. It was once a frightening place packed with a multitude of scattered odds and ends. Now, I use small wicker baskets to maximize the space inside the closet. Unless your towels are stacked all the way to the top of every shelf in your closet, there is valuable space you could be filling with all those toiletries. Here's how:
Read More From Dengarden
- I went to my local dollar store and looked for a small wicker or other woven basket. In your search, make sure the weave of the basket is loose enough that you could fit a Command hook through the top bands of it (see the photo above).
- Like with the paper towel roll, I first placed the Command hooks in the basket where I wanted them to go, and then held them up against the wall for proper placement. Using a pencil, I marked where the hooks should go on the wall.
- Then, I affixed the hooks to the wall of the closet where the pencil marks were.
- After waiting for at least an hour, I hung up the basket by sticking the wire ends of the Command hooks through the weaving at the top.
Voilà! Hanging storage solutions!
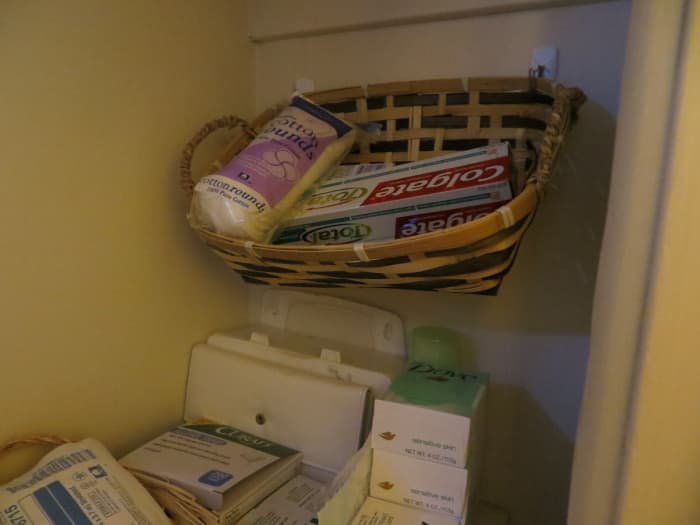
Photo by the author (Blundermom)
How to Hang a Coat Rack With Command Hooks
After moving in, I soon discovered that there wouldn't be enough space in the only closet by the front door to store our coats. I was determined to find a Command-Hook solution to this problem, and sure enough, I did!
- First, I went to my local home goods store and found a nice, lightweight, accordion-style coat rack. Actually, I think this one was advertised to hold mugs or caps, but it works just fine for coats as well.
- Then, I did a little math to determine the approximate weight of all our coats. For my and my husband's winter jackets, I tried each one on, weighed myself, and calculated the difference between that and my usual weight to figure out how many pounds the coat rack would be bearing.
- Given that weight estimation, I figured that I would need two of the jumbo-sized Command hooks to do the job (see link below).
- As shown in the photo, I placed the Command hooks at diagonals, supporting the upper edges of the rack. I also figured I should stabilize the middle of the rack with Command strips, so I took four strips and stuck them to the back of some of those beams toward the center.
- After placing the hooks where they belonged, I held the whole rack up to the wall, and marked the hook placements with a pencil as usual.
- Then, I affixed the hooks according to the pencil markings on the wall and waited overnight, just to be on the safe side.
- In the morning, I placed the rack on the hooks, and then pressed the center of the rack into the wall so that those Command strips would stick as well.
This coat rack has held up perfectly all year! It even stood the test of holding my, my husband's, and our toddler's winter coats through that entire brutal Chicago winter we had (2014). I couldn't be more pleased with it!
Note: This is the kind of hook I used for this project.
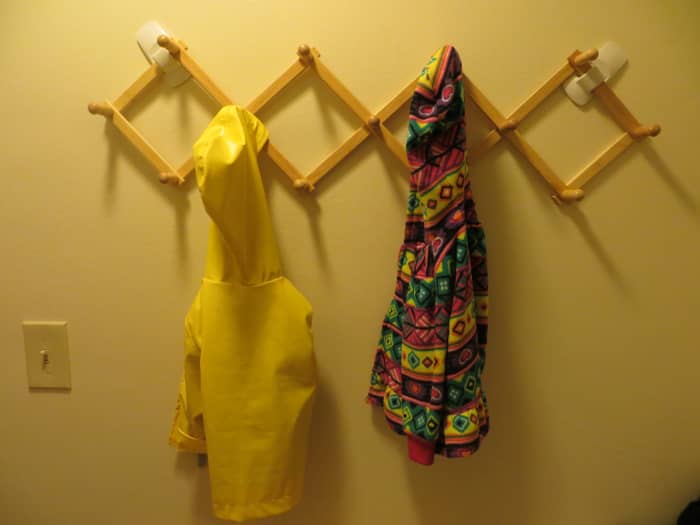
Photo by the author (Blundermom)
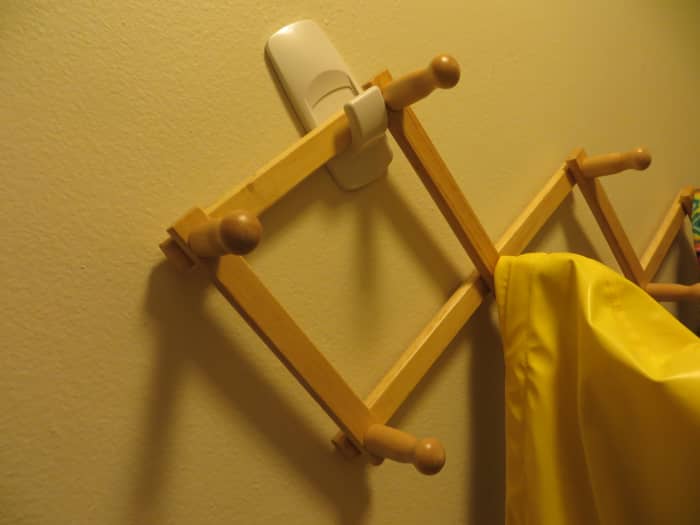
Photo by the author (Blundermom)
How to Hang Large Storage Baskets With Command Hooks
She's not even two years old yet, but already my toddler has amassed a ton of toys, blankets, and all kinds of other things. At some point, the toy boxes started to overflow, and I had to come up with another way to store all of her beloved stuffed animals and such. Above, you'll see a photo from her nursery showing my simple solution:
- First, I picked up some hanging laundry baskets from my home goods store.
- Next, I grabbed some more of those jumbo Command hooks like the kind I used for the coat rack.
- Then, I simply determined placement and affixed the Command hooks as usual (see previous tutorials for more details).
- Like with the coat rack, I decided to wait overnight for the large hooks to set as thoroughly as possible.
- In the morning, I hung up the laundry baskets, filled them with toys and other lighter items, and never looked back!
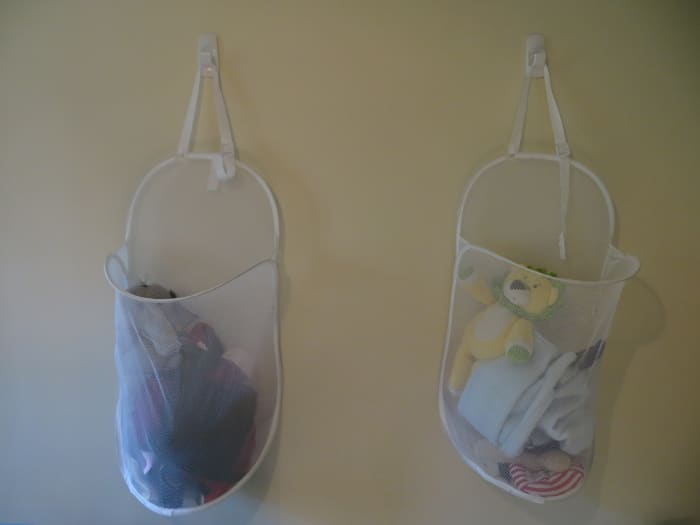
Photo by the author (Blundermom)
How to Use Command Hooks in the Washroom
You might be wondering if you can also use Command hooks in your washroom. So far, I have not had any issues doing so! I think that humidity only becomes a problem if you are going over the prescribed weight limit on the package of the hook you're using.
Above, you will see how I use a medium-sized Command hook to hang my toddler's bath toys by the tub.
Below, you'll see a different medium-sized type with a narrower metal hook to hang up the bath mat by the window so it airs out properly.

Photo by the author (Blundermom)
I know it sounds cliché, but the possibilities are pretty much endless with Command hooks! Do you have another way to use these hooks you'd like to share? Please post it in the comments below!
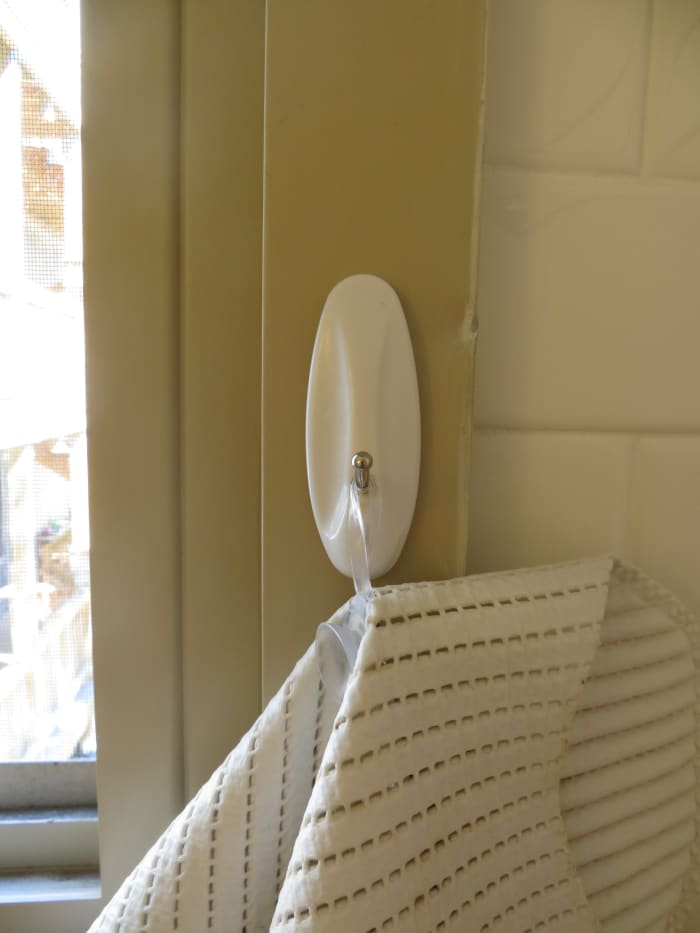
Photo by the author (Blundermom)
This article is accurate and true to the best of the author's knowledge. Content is for informational or entertainment purposes only and does not substitute for personal counsel or professional advice in business, financial, legal, or technical matters.
© 2014 blundermom
Source: https://dengarden.com/home-improvement/Command-Hook-Hacks


0 Komentar